In order to set up archive and recording, you need to:
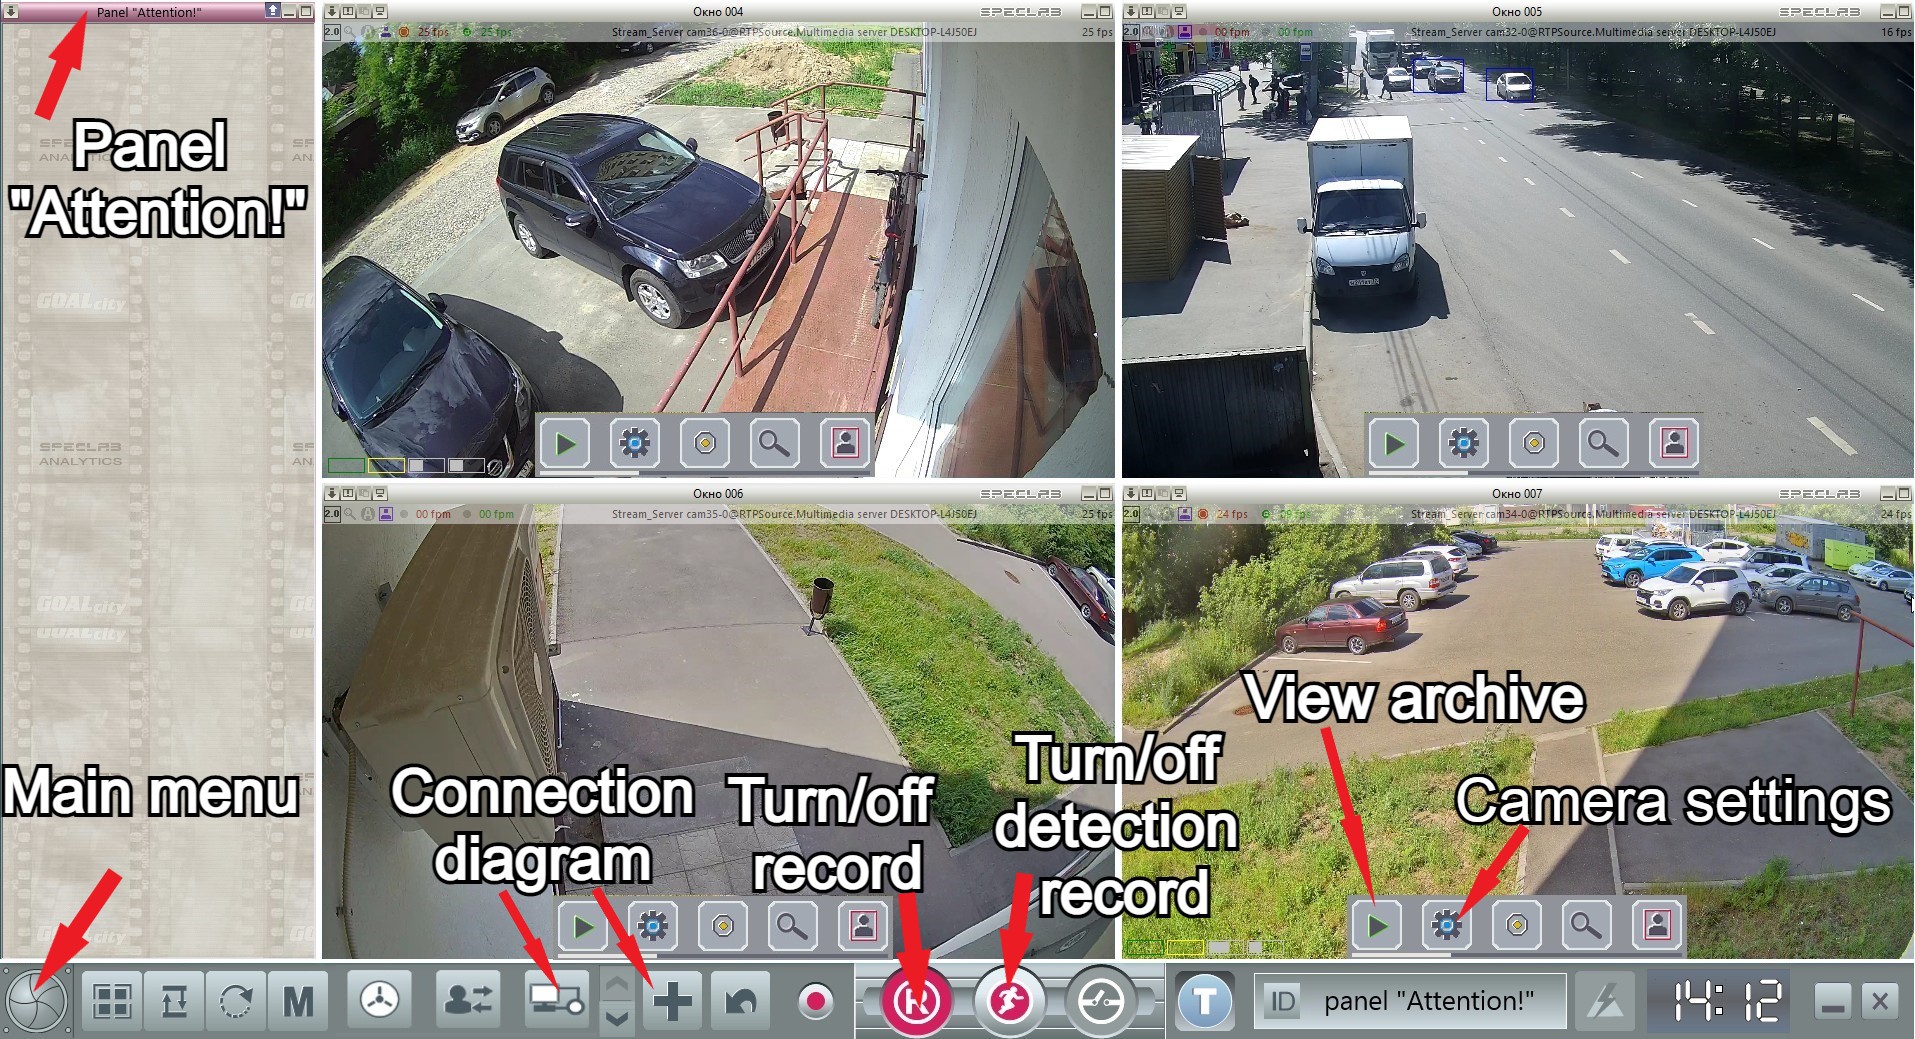
1. Go to Camera settings by clicking on the button ![]() on the pop-up panel in the camera window.
on the pop-up panel in the camera window.
2. Open the Archive
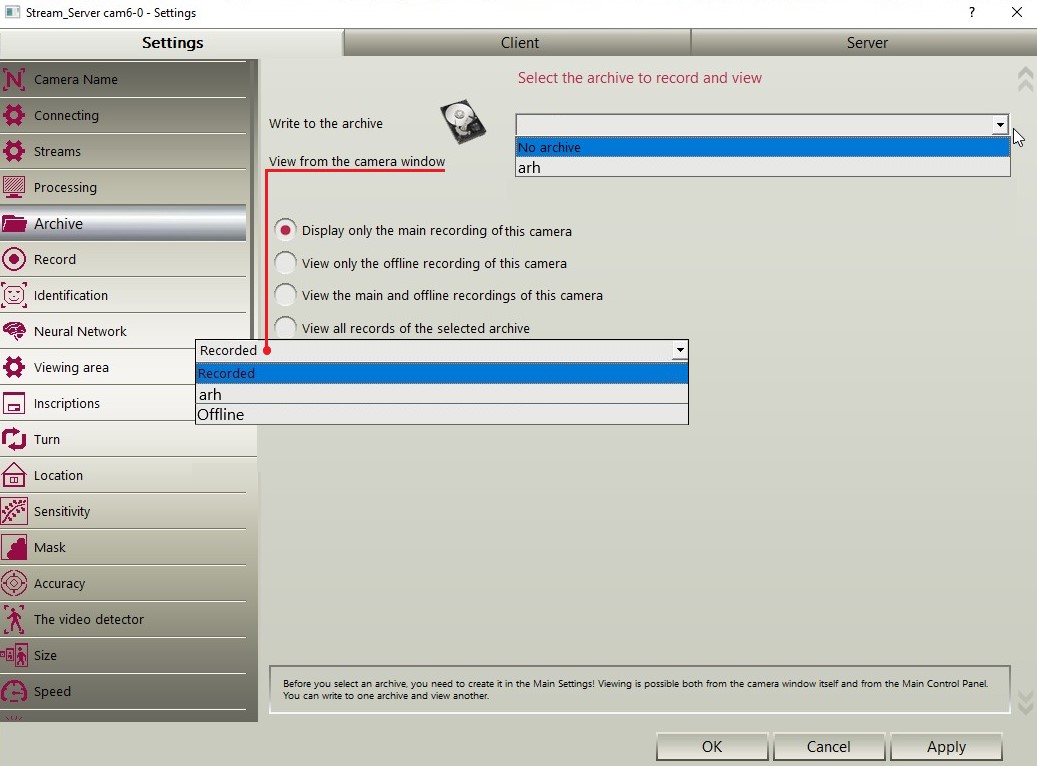
Write to archive - select the archive to which this camera will record video. In the drop-down window there will be a choice of archives connected to the current GOALcity session.
View from camera window - select a recording to view in the window. You can choose between recording from the current camera and recording from the archive from a remote server. If you leave the Recorded option, then the window will play video from the archive that is being recorded.
3. Select which record will be displayed for viewing when you click on the button ![]() - Archive - on the pop-up panel in the camera window.
- Archive - on the pop-up panel in the camera window.
Display only the main recording of this camera - in the window you need to view only the main recording from the camera located in the current window.
View offline recording of this camera - in the window you need to view only the backup recording from the camera located in the current window.
Display main and offline recordings of this camera - in the window you need to view both the backup and main recordings from the camera located in the current window.
Display all records of the selected archive for viewing - in the window you need to view all the records that are in the archive selected for viewing.
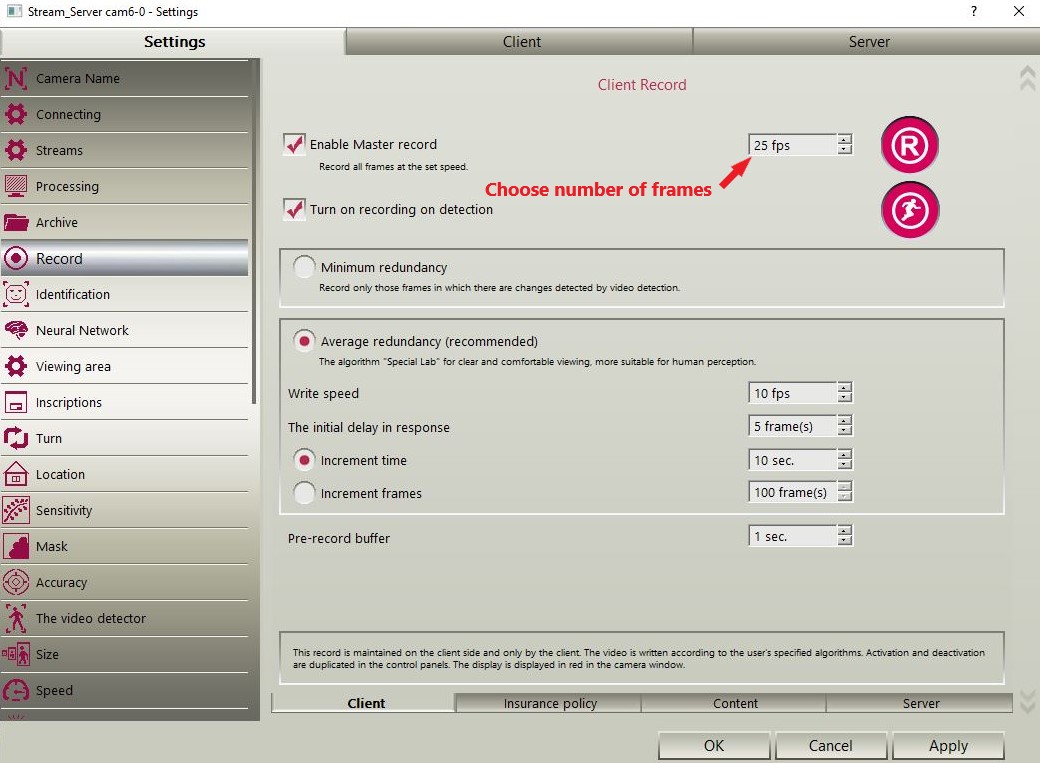
In order to set up a record, you need to:
1. Go to the Recording tab in the Camera Settings and activate the item Enable master recording
Recording by detection - recording will be made in the presence of motion in the frame.
Minimum redundancy - the system will record only those frames in which motion detection is present. This will save disk space, however, as not all frames will be recorded and not constantly, there is a possibility to miss something important.
Medium redundancy is the best option for recording. If safety recording is not configured (more on that below), then if the motion detector is not active, the system will not record. However, if there is any action in the frame, recording will immediately start at the rate specified in the Recording rate field for a time or a certain number of frames.
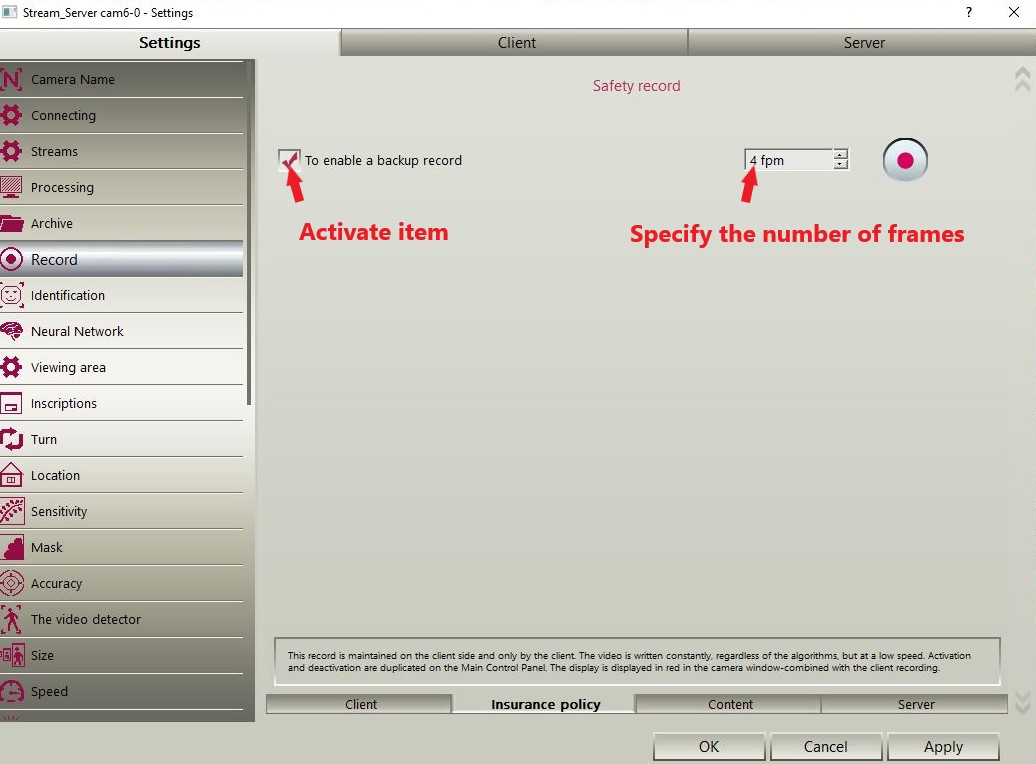
2. Go to the Insurance tab and set up an Insurance record
3. Go to the Content tab and activate the item you need

Record all frames - if the recording requires all frames from the current recording.
Record frames where there is movement - used where movement is rare, to save hard drive resources.
Record frames with faces - if you want to record only those frames in which the system identifies faces.
Record frames where there are license plates - if you need to record only those frames in which the system determines the license plate.
4. Go to the Server tab and activate Offline Recording
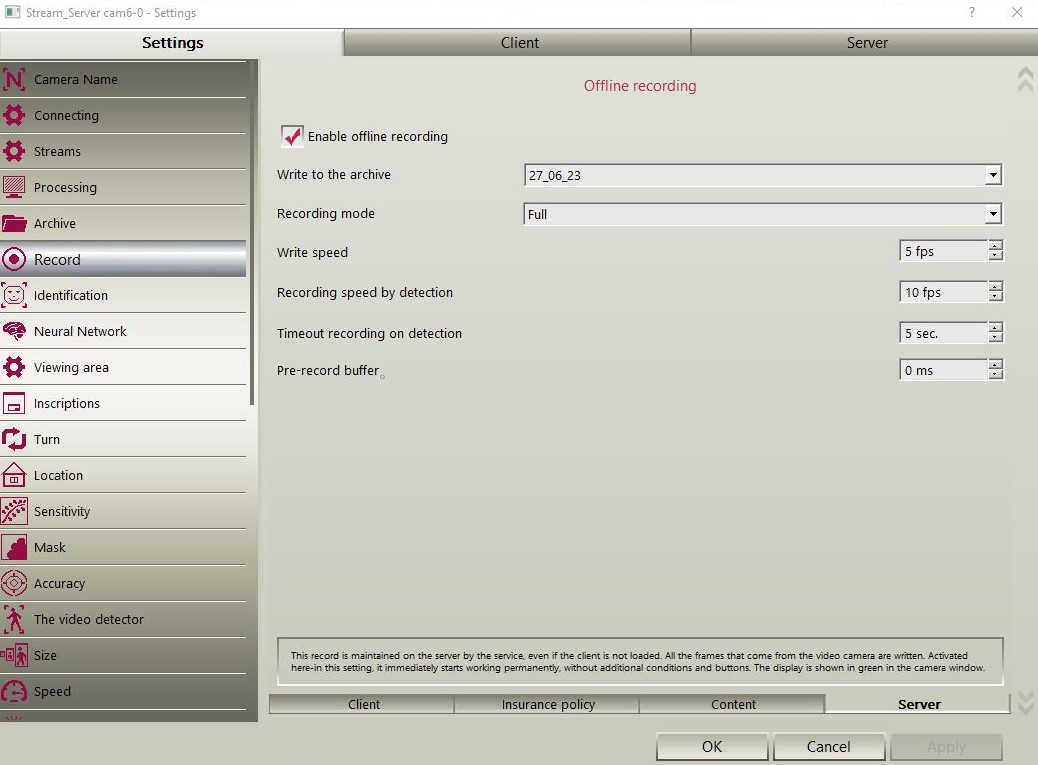
Write to archive - select the archive to which this camera will record video. The drop-down window will list all the archives that are connected to the current GOALcity session.
Recording mode - recording mode, which will be used for backup recording:
-simple - recording will be performed at the speed specified in the Recording speed, fps item.
-full - recording will be performed at the speed specified in the Recording speed, fps item, and when motion is detected, it will accelerate to the rate specified in the Detection recording speed, fps item.
-only by detection - recording will be done only by detection, at the rate specified in the Recording speed by detection, fps item. If there is no movement in the frame, then the recording stops.
-through - the recording speed will be equal to the viewing speed of the fastest client (server) source. If the source (server) has no clients, the write speed will be equal to the base speed set in the Write speed item.
Recording timeout on detection - recording delay after motion detection.
Save all changes by clicking OK.